As a self-proclaimed connoisseur of Asian cuisine, I’m constantly searching out the best restaurants in Saint Louis of the various regions and genres (Thai, Japanese, Vietnamese, as well as sushi, dim sum, et cetera). Having been to many of the staples of St. Louis sushi—Drunken Fish, Kampai, Wasabi, Cafe Mochi, and others—I’ve always been satisfied with their offerings, but yet felt like they missed the mark in one way or another. Don’t get me wrong, all of those places have some great dishes, but I just found them to be lacking that spark to make them stand out as the leader of the pack.
… and then it happened. One day when I was driving north on 61-67 (Jeffco Boulevard / Lemay Ferry), I noticed that the storefront in Water Tower Place that previously housed a mediocre Thai restaurant was set to reopen as a sushi joint. My first thought was “oh no, that’s probably not going to go over well in Arnold” but I hoped for the best. A couple weeks later, it opened as J Sushi. I added it to my ever-growing list of restaurants to try, but didn’t actually make it in for several more weeks.
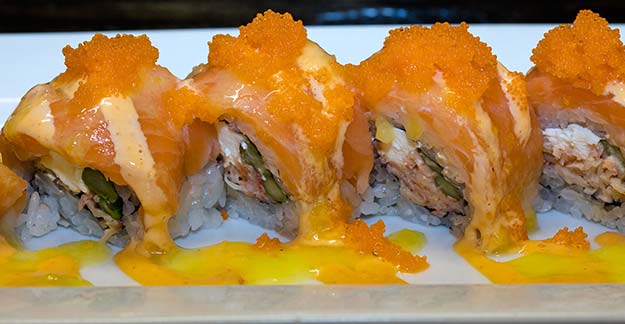
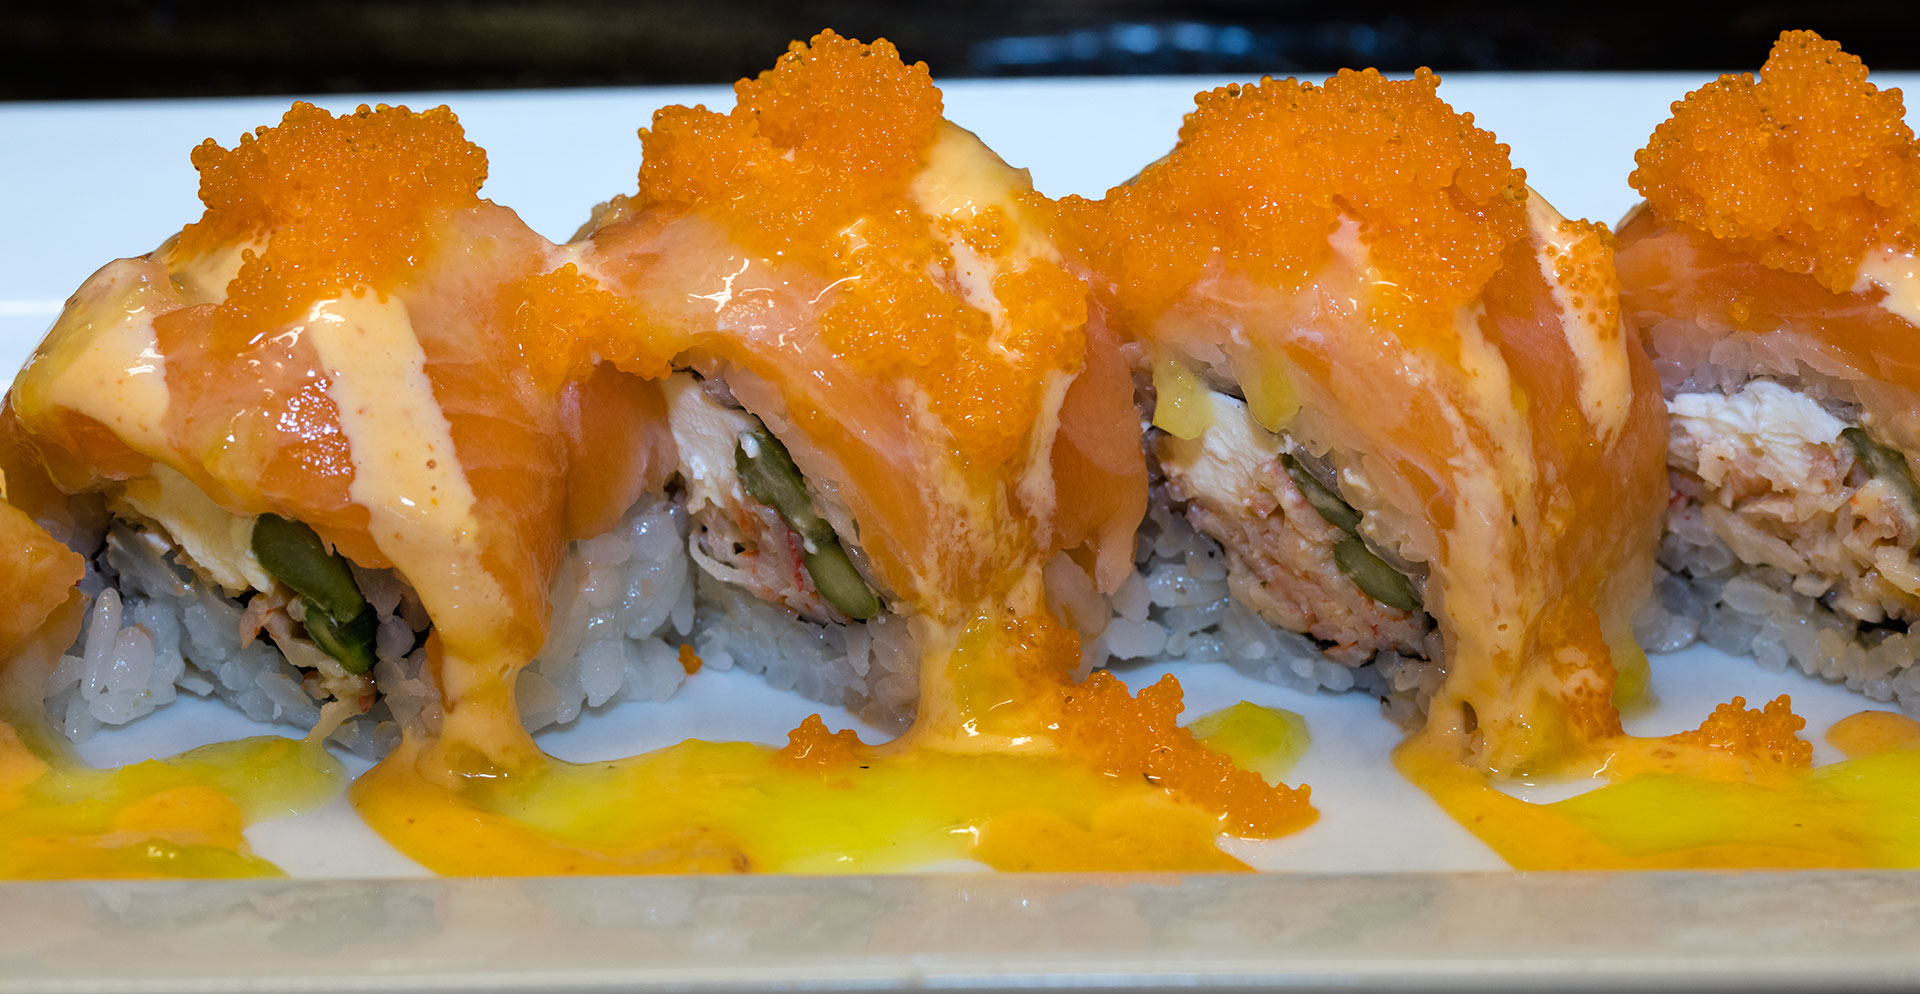
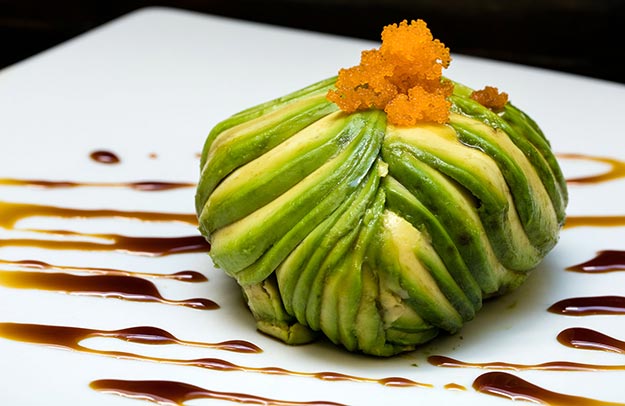
The Salmon Killer Roll with spicy crab, asparagus, salmon, cream cheese, mango sauce and Japanese mayo
(click for full quality)
Named for the original owner, Joon Kim, (who, as of this writing, is the owner of Shogun in Farmington, MO), J Sushi came onto the scene offering a huge variety of Japanese fare. From a smattering of traditional appetisers like tempura and gyoza, to a gigantic list of rolls and sashimi, to the “I don’t particularly care for raw fish” offerings in their Bento boxes, J Sushi offers dishes to appease just about anyone interested in trying Japanese cuisine.
Since their initial opening, some things have changed at J Sushi. One of the biggest differences is that it is now owned by an employee that Joon himself trained in the ways of sushi over the years: Amanda, and her partner, Joseph. The two of them have taken an already-outstanding culinary experience and elevated it even further with their immediately noticeable hospitality and friendliness (not to mention, incredible aptitude for sushi)!
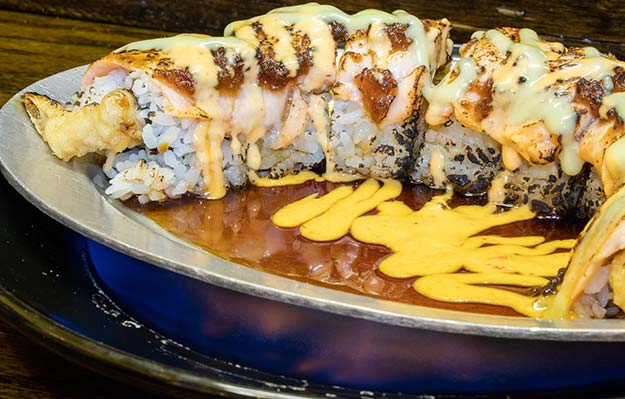
The VIP Roll with seared salmon, and shrimp tempura… it’s on fire!
(click for full quality)
So, now that you have a brief history of the restaurant, let’s get to the key components that I look for when rating eateries. First and foremost, the food has to be far above par. I expect the food to not only be tasty, but also a true representation of the culture, elegantly plated, and creative. J Sushi delivers on all four of those aspects! I’ve had many of their appetisers, rolls, sushi/sashimi plates, and non-fish dishes, and have yet to find one that wasn’t good. Of course I have my favourites, but so far, nothing has hit the dreaded “do not order again” list. As for plating, the sushi chefs recognise that one firstly eats with the eyes. Dishes are presented in a clean fashion and many of them warrant taking a minute to appreciate them visually before delving in with your chopsticks.
Second, the service has to be commendable. At J Sushi, Amanda, Joe, and the members of the waitstaff go out of their way to greet everyone as they come in and thank them after their meal. The waiters and waitresses come to the table often to check on your beverages, and to see if you need to order anything else. At a sushi restaurant, it’s very important to check for reorders as it’s commonplace to order just a couple rolls at a time. I can imagine that one of the complaints about the service is how long it takes to get your food after ordering. Though it is a valid concern, great sushi is intricate and takes time to execute properly. That being said, I have personally found the wait times to be completely acceptable, even when they’re really busy with dine-ins and take-away orders.

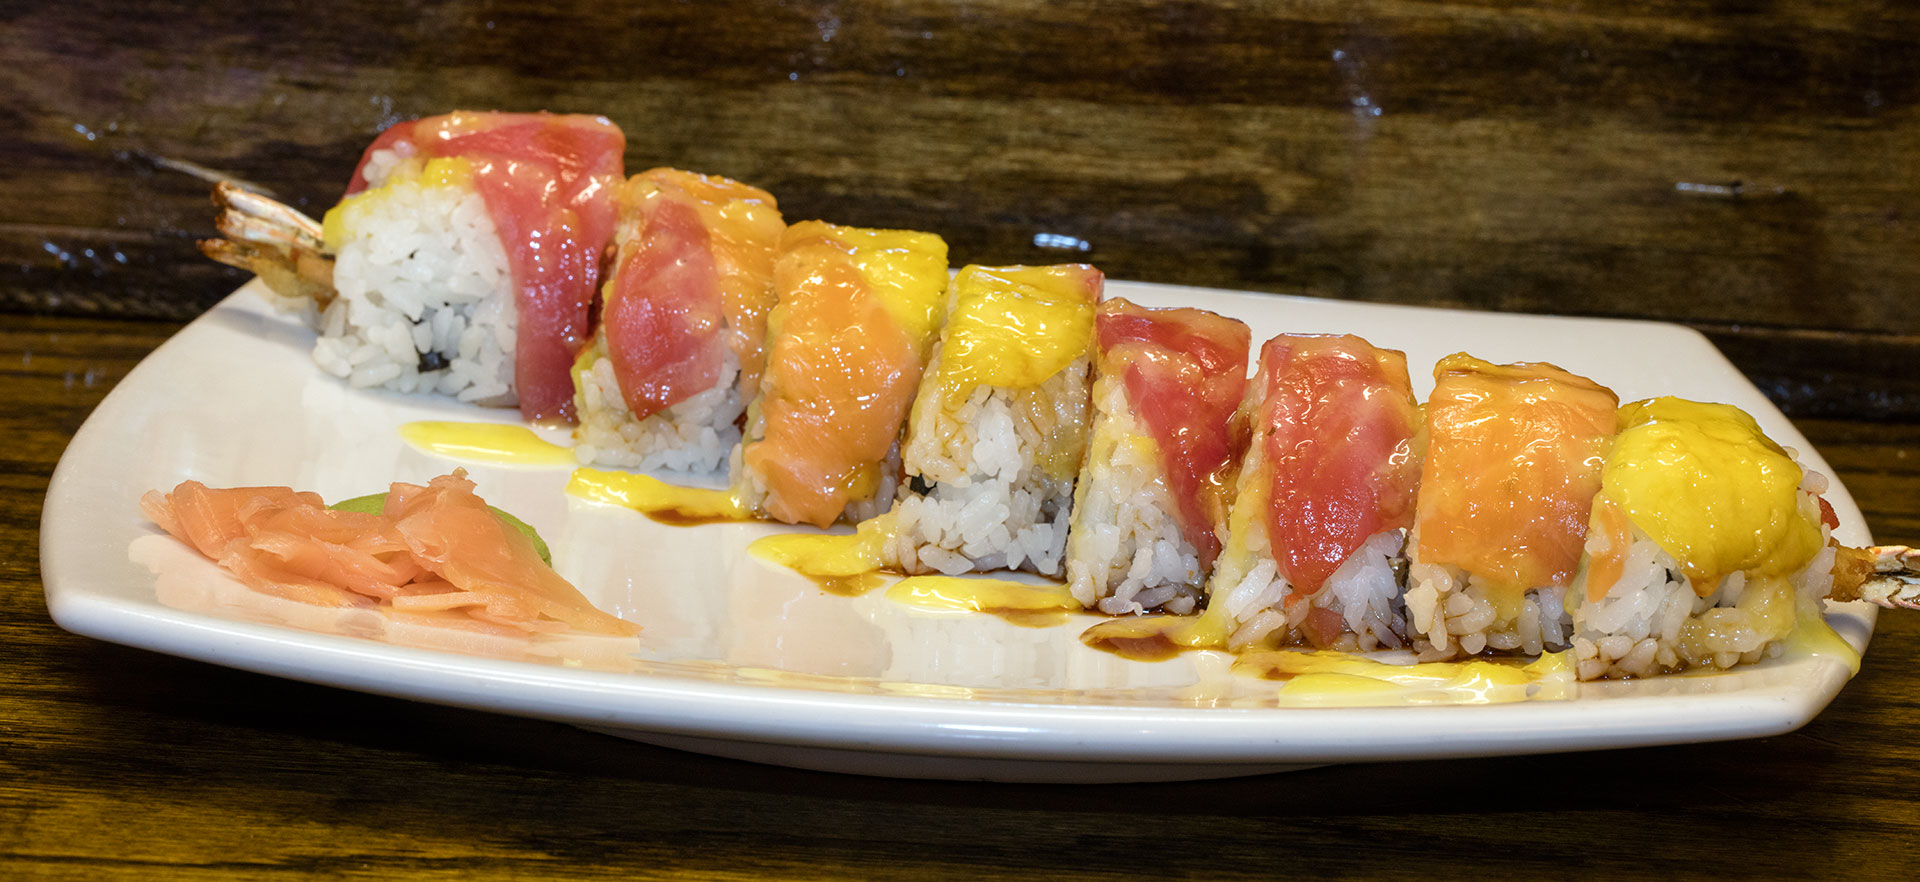
The Master Card Roll with shrimp tempura, and gorgeously overlapped tuna, salmon, & mango
(click for full quality)
Third, the restaurant has to be a good value. Does that mean that it has to be inexpensive? No, not at all. When I’m judging a restaurant’s value, I take into consideration the quality of the ingredients used, the time and labour involved in preparation, the ambience, and the overall dining experience. J Sushi, in my opinion, excels in all of these areas, and still manages to keep their prices affordable. Yes, there are cheaper places to get sushi, and even some that offer “all you can eat” options, but you’re certainly exchanging quality for price at those types of establishments. I, for one, would rather pay a little more money to ensure that I’m getting very high quality fish (especially since the flavours and textures of the fish are exponentially heightened when consumed raw).
The stunningly beautiful Dragon Bowl – as much artwork as it is food!
(click for full quality)
Now for the meat and potatoes (or in this case, the fish and rice): what dishes stand out to me? As I previously said, I haven’t found anything that I dislike on the menu; just dishes that I like more than others. I enjoy changing up my order and trying new things, but there are some items that I keep going back to time and time again. Here are some of my absolute favourites:
Appetisers:
- Japanese Crab Rangoon
- Expecting those Chinese-style fried wontons filled with cream cheese? Think again. This amazing “roll” has spicy pulled crab and cream cheese wrapped in soy paper (Mamenori) and rice. It’s deep-fried and served with eel sauce. NOT to be missed!
- Tuna Tataki
- Perfectly seared (read: “nearly raw”) tuna served with shredded radish and a light sauce.
Rolls:
- Master Card Roll
- Shrimp tempura and spicy tuna inside, topped with fresh tuna, salmon, and slices of mango (see the photo above).
- Sweet Ogre Roll
- One of my original favourites, this roll has shrimp tempura and cucumber inside. On top, there’s seared tuna, Sriracha, a little mayo, crunch, and masago.
- Missouri Thunder Roll
- Derby Roll
- Spicy crab and avocado (I swap that for cucumber). Topped with eight beautifully-grilled shrimp.
- Poison Spider Roll
- HUGE, double-stuffed roll with a whole deep fried soft-shell crab and cucumber. On top, a bunch of spicy pulled crab, masago, crunch, and eel sauce.
Other:
- Tai Nigiri
- Simple Nigiri of Red Snapper
- Hamachi Nigiri
- Simple Nigiri of Yellowtail
- Sushi sampler
- 5 pieces of various Nigiri (raw fish on rice with a little wasabi)
If your mouth isn’t watering by now, then you must not care all that much for sushi (or Pavlov was sorely misguided 🙂 ). I hope that you try some of the amazing food that I mentioned above, but more importantly, I hope that you check out J Sushi and find your the dishes that speak to you personally!
Cheers,
Zach
Important!
The photographs in this post were taken by me. If you would like to use them elsewhere, please just give credit to Nathan Zachary and link back to my blog. Thanks!